Showing posts with label Africa. Show all posts

Monday, July 18, 2016

Battles of the Week, 17 July 2016

Before I get to the week's battles, I owe a pitch to the game I played this weekend, a modern action involving some mercenaries trying to kidnap an African colonel to facilitate the rescue of western executives held hostage by a despotic regime.

Read the whole thing.

In a related vein, Band of Wargame Brothers has a modern African campaign playing out here:  Part 1 (setting) and Part 2 (gameplay), using a combination of the Force on Force rules that I enjoy so much in combination with other modern rules.  Big board, very cool.

Preacher by Day has a Pulp Alley game posted, a unique diplomatic/social contest.

Hook Island has some Hail Caesar! posted, with Greeks versus Persians in a battle from antiquity.

Campaigns in Miniature has a report on a Flames of War tournament.

Kaptain Kobold has some Saga action with Anglo-Danes, Welsh, and Normans squaring off.

Into the Maelstrom has some Napoleonics posted, pretty cool pics.  And some Warhammer 30k posted, too.

Until next week, happy wargaming!

The Zamunda Gambit, Chapter 1: Kidnap Colonel Masondo

My latest campaign, first chapter here, follows a group of Private Military Contractors (PMCs) on a mission in the fictional African country of Zamunda.  Yes, that Zamunda.  The OILCO Corporation, one of several firms owned by Mortimer and Randolph Duke, has had its assets and facilities in Zamunda seized when King Akeem was recently assassinated and replaced by his longtime friend and adviser, Finance Minister Semmi.  A number of senior OILCO executives were taken hostage, and the wily OILCO leadership hopes to rescue them with the assistance of a kidnapped senior official, much as was done in the Gran Sasso Raid or Operation Entebbe.

OILCO hired mercenary firm Extremis Operations Group (EOG) operatives based on their past success in rescuing an endangered executive in Nigeria as the Nigerian Army and Boko Haram were waging war.  The plan was to ambush a convoy escorting Colonel Felix Masondo on a journey in the lightly-forested grasslands to the West of the capitol.  Unfortunately, the EOG team didn't have time to set in an IED or Claymore Mine to knock out the first vehicle.  They would have to use small arms and the one operative who had an M203 grenade launcher might also be able to do it single-handedly.

I played this scenario with the Savage Worlds Showdown tabletop miniature rules, on terrain strongly resembling that of the fantasy scenario I played last weekend, where forest rebels sought to kidnap the King's taxman cousin, only to see the kidnapping target felled by a stray arrow.  Can I escape this trap of trying to kidnap someone, only to end up shooting them in the face?  We'll see...

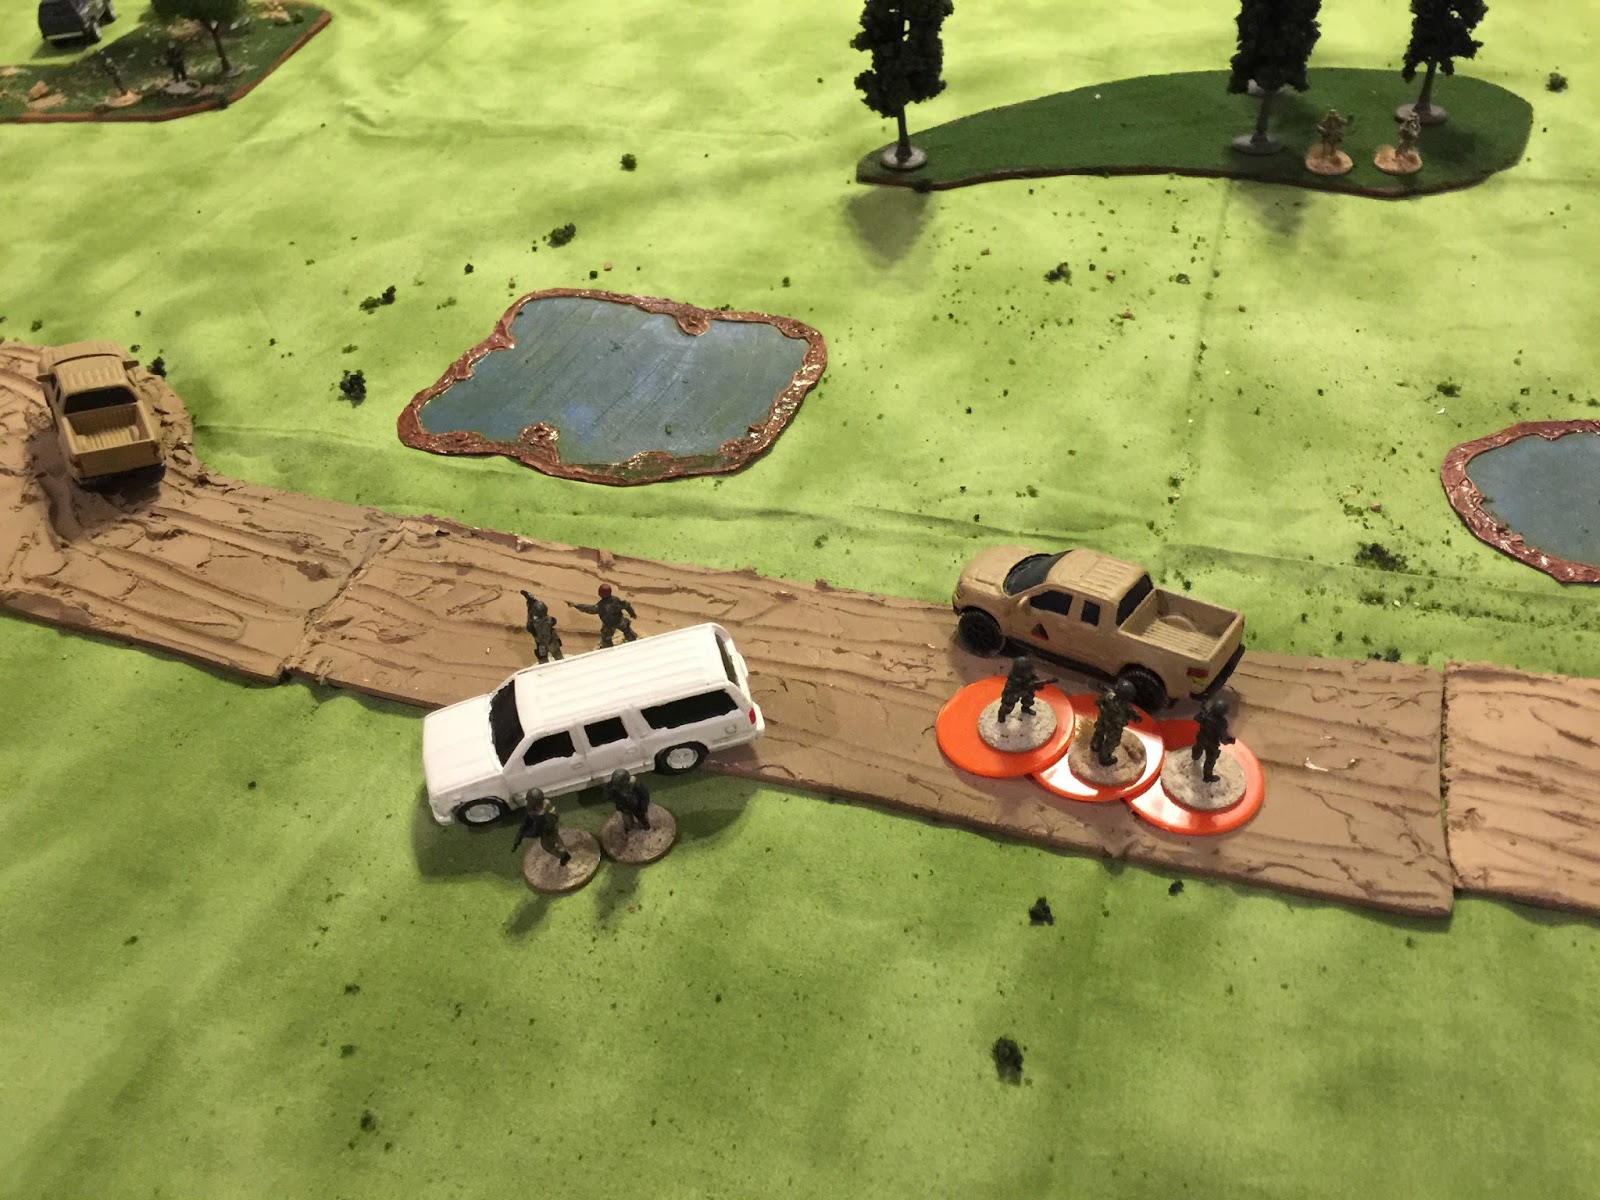
Off to the ambush!  Below, Colonel Masondo's convoy trundles slowly on the rutted, uneven terrain of a soggy dirt road.

Perspective from an angle - EOG operatives lie in wait in the copses of trees.

Here they hit the kill zone.  It's about to go down.

Before we start the ambush, here's each vehicle with the troops inside in a row to show who's in the fight.

Lead truck:  6 Zamundan Army soldiers.

Middle SUV:  Colonel Masondo and three western security contractors with the same level of training and equipment as the EOG operators.

Trail truck:  6 more Zamundan soldiers.

The EOG operators.  Six trained and battle-hardened special operations veterans hoping to wipe out the escorts and make off with Colonel Masondo without any casualties of their own.  All they have to do is make a good shot with the first M203-launched grenade.

Oh no!  They roll a 2 and shank the initiation of the ambush!

A ridiculous miss this was, hooking far left of the target.

The lead truck, however, didn't escape harm at all.  Small arms fire from three EOG operators killed 5 of 6 vehicle occupants and left the other shaken (two leftmost minis represent soldiers in the cab of the truck, the four to the right are in the bed).

The trail truck fared much better, with only half of the occupants hit by small arms fire.

The dead and wounded drivers, along with small arms fire that take out one of the SUV's front wheels, force all three vehicles to the side of the road and able-bodied occupants quickly dismount to seek cover elsewhere.  The three Zamundan soldiers at the trail truck are shaken from the casualties their unit sustained.

The EOG operators at the M203 position see the security contractors dismount from the driver's side of the vehicle and take them out with accurate fire.

On the passenger side of the vehicle, the lone western contractor guarding Colonel Masondo does what he's trained to do.  He lays down suppressive fire on the ambushers that he can see and moves the principle to cover.

Medium blast template covers the EOG operators targeted.  I was underwhelmed by the effects of suppressive fire in this instance.  Not sure if these rules get it right.

Masondo's only surviving western PMC guard then turns his attention to the flank EOG position as one of the Zamundan soldiers is picked off.

Meanwhile, the EOG operators from the M203 position at the front of the convoy race from cover and open fire on the two unharmed Zamundan soldiers from the rear.

The Zamundans go down, leaving only the western security contractor to get Colonel Masondo out of this mess.  The two EOG operators at the flank position take aimed shots, and with their optics, on a d10, only a 2 will miss, and only a 1 will mean hitting Colonel Masondo instead of the last remaining security contractor.

Two ones!  Colonel Masondo goes down hard!

Masondo takes a dirt nap...

Return fire from the remaining contractor leaves one of the EOG operators shaken (orange token).

As if on cue, the driver of the trail vehicle comes out of his shaken status, exits the vehicle, and opens fire on the flanking EOG position.

A lucky shot!  The other EOG operator is killed!

Of course, the two EOG operators outflanking the last security guard are still approaching...

...until that last security guard wins initiative and smokes them both!

As this is going on, the surviving EOG operator at the flank position drops the driver who had killed his EOG comrade in arms.  The EOG operator then fires at the last opposing soldier, only to have it bounce off of the contractor's ballistic plate carrier.

As the surviving western security guard turns to fire on the EOG flanking position, the other two surviving EOG operators flank him...

... and shoot him down!

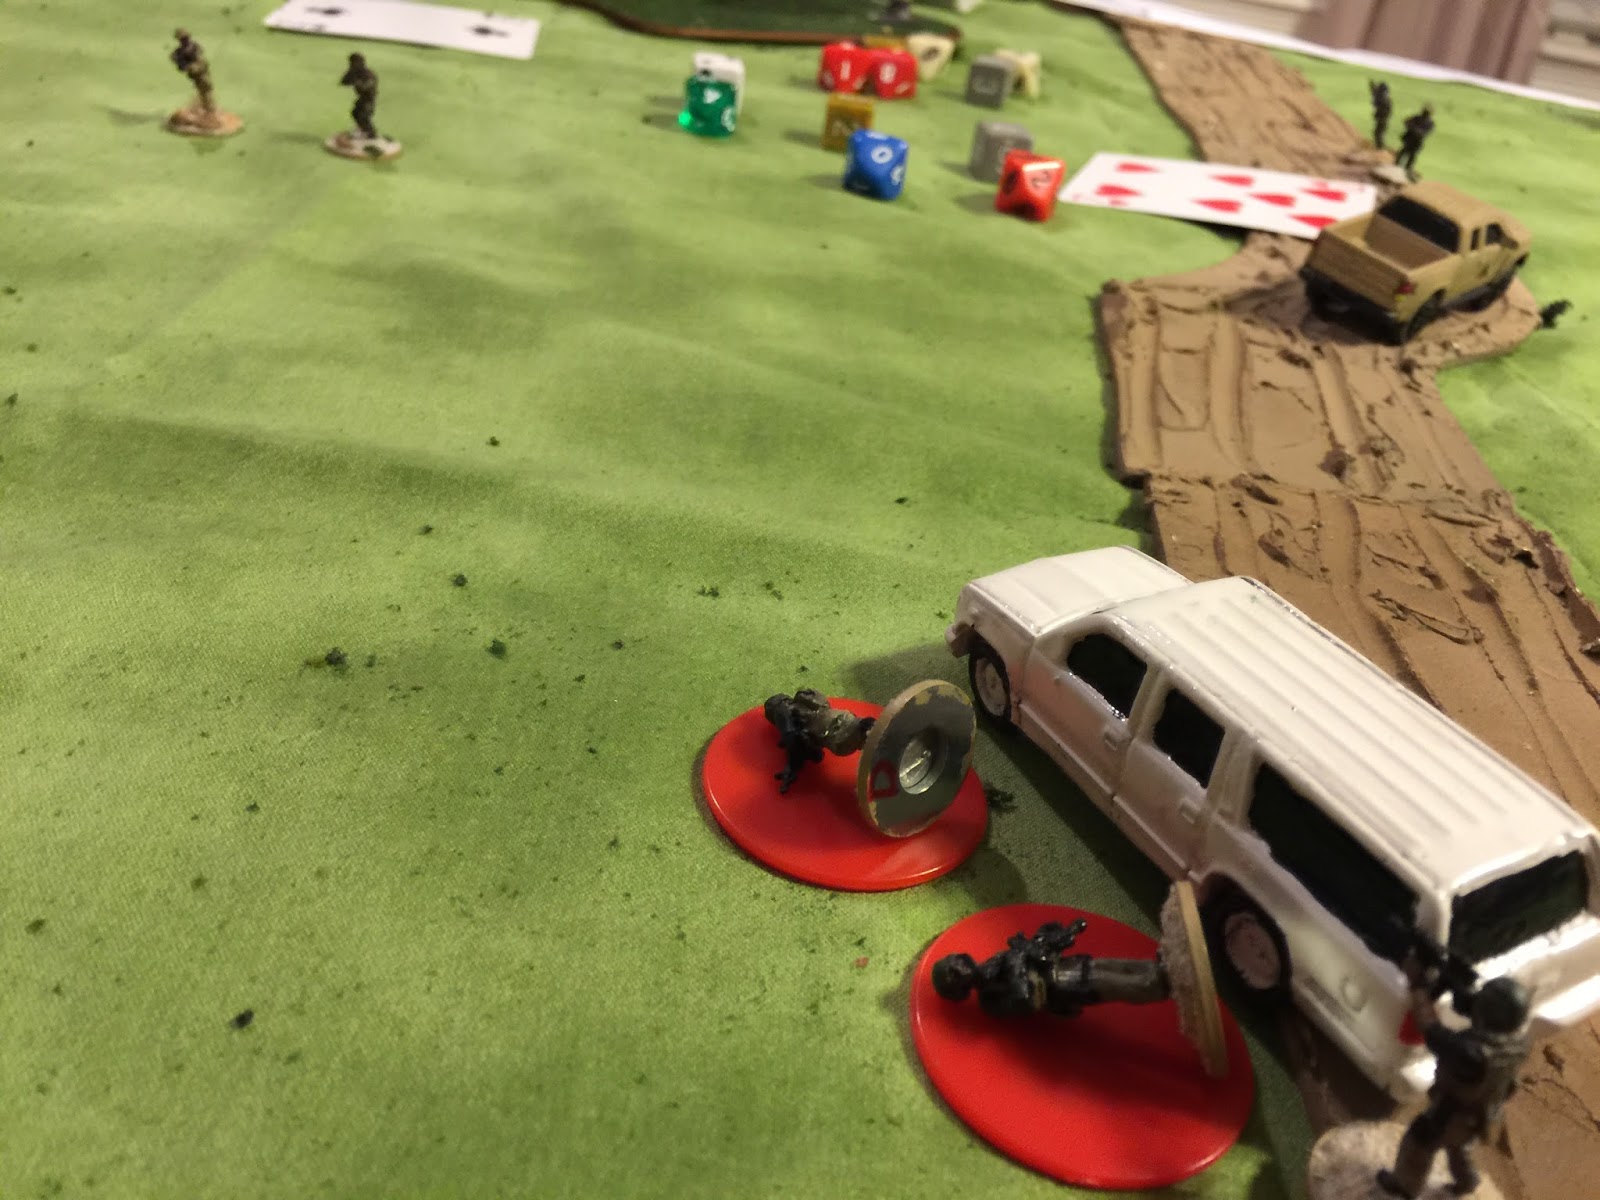
Post-battle casualties with red tokens...
...I see dead people.

AAR/Postcript:
1.  Well, this went exactly how I didn't want it to happen.  The same way last week's game went, where a planned kidnapping resulted in the death of the kidnapping target.  Not sure how I break this curse, but the dice have been harsh on VIPs lately.

2.  I'm still working out the kinks on the Showdown initiative system, which is card-based.  It definitely gives an order to who moves, first to last, but it's randomized unless you pay for a unit/character trait that permits drawing two cards and picking the best one, or getting a re-draw if below a certain level.  It certainly creates a feeling of a fog of war, but I don't think it takes into account the effects of leadership and decision cycle advantages that make aggressive leaders, fighters, and units successful.  More to follow as I continue to develop my own rules that take this into account.

3.  I screwed up the armor protection in this game.  I used the modern light armor instead of the heavy armor, which does have the ability to stop 5.56mm and 7.62mm rounds.  I should have priced out that body armor for equipped minis, and rolled to see if it stopped covered hits (percentage of body protected).  Instead, I had the effect of pistol body armor in a rifle-equipped battlefield.  Having said that, the Showdown system seems to be a pretty solid universal skirmish system, which is quite extraordinary.

4.  Well, this was a hell of a start to a campaign.  I'll take a hard look at OILCO options for follow-on operations after this initial failure.

Sunday, May 8, 2016

Modern Battles of the Week, 8 May 2016

Doing things a bit differently this week.  I've got a few modern warfare AARs that I've been wanting to highlight, so I've split the battles into two entries:  this one for modern warfare, and this other one for fantasy, historical, and sci-fi battles.

First order of business is to add a new site to my blogroll, Hotel Zugando, where a 28mm scale modern wargame set in a fictional African nation is playing out with the Force on Force rules, the game that brought me back to wargaming after over two decades away.  Some AARs from that blog:
- Contracting Trouble, the ubiquitous Force on Force scenario, swapping CIA agents in for the contractors.  This was the first Force on Force game that I played, way back in my inaugural post.  And its been played and posted on the web by a number of folks:   DonoghDonogh reduxvon LuckyDan, and Dave.
- A Few Blocks of Hell, right out of the FoF book and  translated to an African setting.
- Closing Up Shop, another USMC-African rebel showdown with an interesting outcome.

Second on the to-do list is another addition to the blogroll, Rabbits in My Basement.  A couple of posts from this blog drew my attention - one with a day-long gaming session that starts with a Black Ops game set in Afghanistan, then a WW II Chain of Command, then Some Lion Rampant, and finally some War of the Ring action.  And a post where the author kitbashes FUBAR, Black Ops, and Chain of Command for a convention game set in modern Afghanistan.

And, here's a game trying to adapt a Vietnam scenario from Face of Battle into Force on Force, and struggling with the vehicle damage tables.  A common complaint that I houseruled into submission.

And though I've never played Buck Surdu's Combat Patrol, here's a write-up of a game set in Africa with a modern setting, and one set in WW II.


Tuesday, September 1, 2015

Library of Force on Force AARs

If you're reading this in the full web site version, you should see a listing, "Force on Force:  Theaters of Conflict."  Within each of these links is a brief description of the eleven Force on Force games I've played over the last year or so.  For those of you reading this in the mobile version of this blog, I'm duplicating the directory below:

Force on Force: Theaters of Conflict


Real life concerns - work, kids, and such - have brought a halt to gaming as of late, but I'd still like to get around to a Special Forces campaign set in Afghanistan and a campaign set in the Libyan revolution.  We'll see if/when I get around to those.

Enjoy the AARs!

Friday, January 23, 2015

Showdown in Baga, Nigeria

Played another game of Force on Force with the good folks at CSGA on Saturday.  We played a scenario I wrote based on current events, the Boko Haram sweep of Baga, Nigeria

I took some license with the facts - the Nigerian Army (NA) showed up with a force roughly equivalent to the Boko Haram (BH) elements in this part of town, and a third faction, the military contractors of Extremis Operations Group (EOG) had their own mission, the retrieval of an executive for OILCO International (the "VIP") who had the misfortune of being in Baga when the BH forces made their move.  The EOG and NA forces were not directly aligned, but wouldn't shoot at each other. 

BH forces had objectives of seizing a Nigerian government center, destroying NA forces, and securing the OILCO VIP for ransom if possible.  NA forces received no points for the VIP's status, only for securing the government center and destroying BH forces.  The EOG contractors, all former SOF operators (TQ d10/Morale d10), were only worried about securing the OILCO VIP.  The EOG team lead bribed the NA commander to secure his acquiescence to the EOG presence on the battlefield.  The OILCO HQ had four poor quality (TQ d6/Morale d8) guards armed with AK-47s holding the fort until the EOG extractino team arrived.  The NA and BH forces were TQ d6/Morale d10 regulars, with Boko Haram irregulars arriving per normal insurgency rules.
View of the board from the Nigerian Army (NA) entry point.  The Extremis Operations Group (EOG) contractors launched their extraction mission to the right of the NA deployment zone.
View of the board from the Boko Haram (BH) entry point.
The Nigerian Army forces:  A T-55, BTR-70, and DShK-equipped technical.  Three-and-a-half squads of infantry.  All Troop Quality d6, except the crews of the armored vehicles, which were d8.
The Extremis Operations Gourp (EOG) contractors, all Troop Quality d10.

 The OILCO VIP ( who looks nothing at all like a downed pilot, my normal extraction subject) and the four untrained and unmotivated guards (TQ d6/Morale d8) who are about to get more than they bargained for with this guard shift.
The Boko Haram forces:  A T-55, two DShK-equipped technicals, and a couple dozen fighters (TQ d6/Morale d10).  They also received reinforcements at two Hotspots at the board's edge that represented the semi-organized nature of an insurgency that is not quite a regularized fighting force.
Turn 1:
Initiative rolls provided the following order of movement:  NA, then EOG, then BH.

The Nigerian Army forces advanced to relieve their comrades currently under siege at the government compound.  The forces at the compound engaged in a firefight with a Boko Haram cell in a nearby building.  Each side took one casualty, but then the NA T-55 weighed in on the matter with its 100mm gun, wiping out the BH fighters.
Wiped out Boko Haram cell.  The Nigerian Army tank that felled them is visible in the distance.


EOG advanced toward their objective and engaged in no fighting.
EOG on the move in a technical and a jeep.  Both had FN MAG medium machineguns, and the gunners were kitted out in mufti to hide the true nature of these mysterious gunmen.
The BH forces advanced as well, with their T-55 moving down the main drag and taking a shot at the NA BTR-70.  It scored a hit that destroyed the vehicle and inflicted 5 x KIA.
 Bail out! Bail out!
The BH technical advancing toward the government compound fared poorly.  It inflicted a couple of casualties with its DShK, but return fire destroyed the vehicle and killed the crew.  Four BH infantry troopers riding in the bed of the truck survived.
Nigerian Army forces under siege at the government compound celebrate the destruction of the Boko Haram technical that had attacked them.
Turn 2:
Initiative came out EOG-BH-NA

EOG continued to drive toward the OILCO headquarters, and made no contact with BH forces.
EOG operators drive toward cover before their final approach.
The BH T-55 fired a round at the government complex, hoping to neutralize resistance prior to their infantry's approach.  The round brought the building down, making all 6 NA soldiers there into casualties.
The Nigerian government complex explodes just as BH forces closes on the entrance at the outer wall.
Reverse angle shot of the BH advance into the Nigerian government compound, well covered by tank fire.

NA forces advanced, and the NA T-55 got a main gun round off at the BH T-55, immobilizing the latter.  The NA armored troopers' higher Troop Quality and the tank commander staying unbuttoned helped one crew beat another to the punch in identical vehicles.
The security guards at the OILCO HQ opt not to engage in the fighting, watching Nigerian Army artillery rounds fall harmlessly on the far side of the compound on the right.
Turn 3:
Initiative went EOG-BH-NA

The EOG operators moved up to the OILCO building's rear entrance and dismounted.
The security guards at OILCO HQ decided that this would be a good time to start engaging BH forces.  After a harmless exchange with one dismounted element, in which the security guards drew the Fog of War card "An Excellent Position" and added a defense die to their perch overlooking the battlefield, the BH T-55 got involved with its main gun and made them all casualties.
Irony can be so... ironic.
The Boko Haram T-55's view of the OILCO HQ.
Boko Haram troops move up to the blockaded entrance of the OILCO HQ building, preparing to hop the compound wall in the next turn.
The Nigerian Army, meanwhile, stayed on the march. The NA technical and pickup truck ferrying troops to the front disgorged their soldiers right at the back end of the government complex.  I ruled that the remnants of the back wall of the collapsed building provided a cover bonus for any unit being engaged by the other side, but that any unit crossing the waist- to shoulder-height pile of rubble separating forces would lose its cover bonus.
NA and BH forces square off across the remnants of the collapsed government center building.  BH forces took out the DShK on the NA technical and one NA soldier.  BH took four casualties.
The Nigerian T-55 fired another shot at the Boko Haram T-55, but only earned a Suppress result.
The NA soldiers who survived the destruction of their BTR-70 had by now moved forward into the fight and engaged the BH forces assembling outside the OILCO HQ compound, inflicting three casualties on BH and receiving none in return.
Turn 4:
Initiative went BH-EOG-NA
The BH T-55 took a shot at the NA T-55 and destroyed it.  Which is only fair, since the NA T-55 had already hit the BH T-55 twice, resulting in an immobilization and suppression, respectively.
Nigerian Army T-55 destroyed, with only the commander (and force commander) surviving.
View from the Boko Haram T-55's vantage point.
Meanwhile, back at the OILCO HQ, the BH troops had scaled the compound wall and engaged in a round of fire with the two EOG operators who had come in to retrieve the OILCO VIP.  Each side took a casualty.
A BH technical peels off three NA soldiers from the outside of the government complex with very effective DShK fire.
NA and BH forces inside the government compound exchange fire, inflicting casualties on both sides.
EOG's initiative comes up, and operators reinforce their comrades inside the building.  They inflict 3 casualties on the BH troopers in the courtyard.
The supporting EOG vehicles fight around the berm next to the OILCO HQ, inflicting casualties on the BH side, but the white EOG truck was immobilized (impacting VIP and operator escape options) and reducing the jeep's machine gun to half firepower.
Nigerian Army forces finally took initiative and advanced over the rubble and into the contested government compound.  Both the Nigerians and Boko Haram forces took a casualty.  The Nigerian Army received another BTR-70 on a lucky Fog of War card.
Turn 5:
Initiative went NA-EOG-BH
Due to a Fog of War card, the Nigerian Army received a DShK-equipped technical.  In the courtyard of the Nigerian governmetn center, another round of fire produced 2 NA and 5 BH casualties.
The fruits of EOG's labors.  The last BH troopers trying to capture the OILCO VIP are down.

EOG took initiative next, and killed the last BH trooper on the far side of the berm from the OILCO HQ, and killed the BH troops in the OILCO HQ courtyard.
The last outside resistance to EOG at the OILCO HQ gets wiped out.

Just as the EOG operators exited the OILCO building, the BH T-55 blew up the EOG truck.
Just as EOG operators were escaping, a Boko Haram tank takes out their pickup truck.  Luckily no one was inside by this point.
As the BH faction took the initiative, the last remaining BH technical fired at an NA technical, missing, and getting immobilized for its trouble.
Boko Haram technical initiates fire against a Nigerian Army technical and loses, getting immobilized.
Turn 6:
Initiative went NA-EOG-BH
The Nigerian Army kicked off the turn by destroying a BH technical.
EOG operators, meanwhile, evacuated the OILCO VIP from the regional HQ.
Go! Go! Go!
As a last deparate act, the BH forces rushed into the Nigerian government compound and took out the NA fire team inside in a brutal exchange of fire.  This gave Boko Haram control of the compound for victory point purposes, which would prove decisive.

We called the game here.  At the end of the game, we tallied the victory points at:
EOG: 20 (maximum)
BH: 48
NA: 47

In the end, it came down to a close game decided in the meatgrinder of the Nigerian government complex.

Lessons Learned:
- New house rule:  12" minimum range for RPGs and grenade launchers.  Reasoning seems obvious.
- The initiative house rules work well.  Each leader gets to roll a die at their quantity and Troop Quality level.  Most successes wins; if tied in successes, compare the numbers rolled.  Anyone except the lowest-rolling faction can put forces on overwatch.  Though not presented by the forces in this scenario, this makes Designated Rifle Marksmen and snipers that much more valuable for their ability to knock out the enemy's ability to gain the initiative.