Played another game in the Campaign for the Darkened Wood, this one between two human factions - the royal troops of King Richard and the rebels led by former military officer, now insurgent leader, Robb. Robb and his men take refuge in the darkened wood, but periodically venture out from their home base and haven to attack King Richard's men and symbols of power.
Today is such a day. King Richard's younger brother, a dilettante by the name of Lionel, serves as tax collector for much of Richard's kingdom. He is making the rounds in the outer regions of the kingdom, and his horses (by Robb's design) have taken sick. He must make the next leg of his circuit on foot through a lightly wooded area near the Darkened Wood.
Robb plans to be there. With the successful kidnapping, and subsequent ransom, of Lionel, he can secure funds to continue his revolution and the abolition of Richard's wicked reign.
The scenario I set out dictated the following - Lionel moves at 6" per turn, does not fight, and if he is put out of the fight by wounds, Robb and his men lose the chance to kidnap him for ransom. This campaign is currently being played with Savage Worlds Showdown.
Here's the start of this "walk in the woods" from the rear of the Royal column:
Here's an aerial view with some perspective:
The leader of Lionel's bodyguard, Captain Trent, has express orders to keep Lionel safe in his journeys through the hinterlands. Here's Trent, Lionel, and a few of the troops:
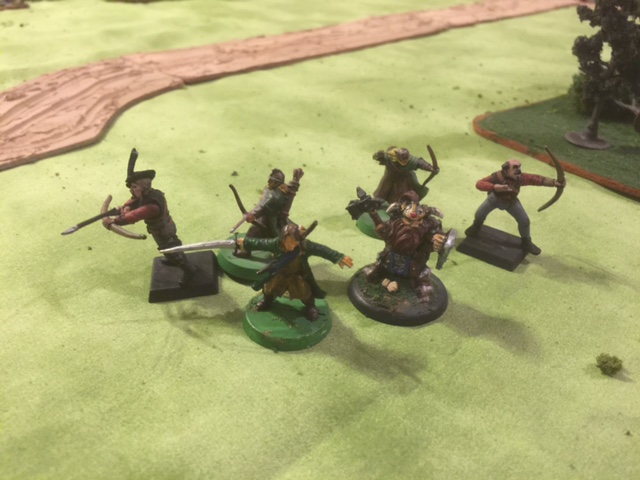
And here's Robb, the Dwarven mercenary Erik the Berserker, and a few of his rebels, outfitted with bows and short swords or axes.
And, on to the game...
Lionel and his escort are making good time through some fields broken up by copses of trees.
Treachery! Robb and his dastardly rebels spring their trap.
More treachery! As the rebels rise from hiding places in the woods, Captain Trent and his men go on alert and face their shields toward likely arrow fire... which is every direction. They are surrounded. In the opening seconds of the ambush,
As the first turn wraps up, the rear of the column shows a number of troops in the rear Shaken, and some in the front as well as the advance guard run forward and assault a nearby group of rebels.
The state of affairs after the first turn in the center of the column. Lionel (blonde hair) is surrounded by troops. Two royal archers have fallen to rebel arrows.
Disaster! A rebel arrow (they weren't supposed to fire at Lionel's inner circle of bodyguards, but they ran out of other targets) finds its mark and makes a catastrophic hit on Lionel. He falls to the ground dead and Captain Trent picks up his corpse to carry it out of the ambush.
The advance guard assault laid low two rebel archers and sent two more fleeing.
The rear guard has lost a couple of troops, and two more are Shaken. Erik the Berserker charged from his hiding place, but failed to reach the enemy troops on account of his short, stumpy legs.
Disposition by the end of Turn 2. Lots of yellow Shaken markers out there. The king's men hit a lucky break when they drew a joker and were able to lift the shaken tokens from one of their units, putting two archers back into action. They immediately fired at some rebel archers in nearby woods who had to spend a bennie to avoid breaking.
The rebel archers that fled the hand-to-hand combat at the front of the column use a great initiative card to flee the field. Cowards.
Erik the Berserker has finally made it into combat with the king's men, only to miss horribly when swinging his war hammer.
One more turn done. Captain Trent's main body is making slow progress as he carries the corpse of Lionel (only 3" movement per turn) and rebel arrows continue to take their toll.
The royal advance guard has broken one rebel unit, and charges to engage another. The orange token under the royal archer notes that the mini has failed a morale check and is fleeing the field, running forward to leave the battle.
Royal forces continue the long slog forward, with Captain Trent carrying Lionel's body.
Close-up of Captain Trent carrying Lionel's body. Fallen royal troops litter the other side of the road.
Erik the Berserker locked in combat with royal troops, with rebel archers lurking in the woods at the rear guard's position.
One of Robb's arrows finally hits home, wounding Captain Trent (red marker underneath mini). Trent continues to slog on and keep his shield toward the sources of the arrows.
The royal archer that was leaving the field rallies and fires a very accurate arrow of his own at Robb, wounding the insurgent leader.
The royal advance guard rallies to Captain Trent to form a shield wall and protect their leader as they back off of the field.
Captain Trent continues to carry out Lionel's body. Rebel arrows have piled up three wounds on him (out of a possible four).
The royal state of affairs at the end of the game. Robb will succeed in carrying off Lionel's body, but the bodyguard retinue has been destroyed.
The view from the rebel firing line. They have abandoned their hiding places to rain arrows on the royal troops, though few succeed in wounding the better equipped royal soldiers.
At this point, I called it a game. Captain Trent would live to fight another day, and he and Robb were sure to meet again on the field of battle.


No comments:
Post a Comment