Showing posts with label Special Operations. Show all posts

Sunday, January 19, 2020

Special Ops Extraction

We tried a new mission type for our latest Force on Force game, a special operations team extracting an enemy VIP in the Middle East.  In this case, it's a scientist with deadly WMD knowledge who the terrorists would rather kill than surrender to the Americans who came to retrieve him forcibly.
This game took place at night, with visibility limited to 18 inches for the terrorists, who lack night vision goggles (NVGs).  The eleven operators are d10 Troop Quality, d12 Morale, and the terrorists are d6 TQ and d10 Morale.  The four-man team moving with the scientist, the transport team, suffered the Dependent penalty and could not make a Rapid Move.  The overwatch team was set up outside the compound ready to move back to the extraction vehicles at the far end of the board.  The vehicles were being guarded by three female operators that eldest daughter wanted to paint while her brothers were painting.  Eventually, she'll have five of them, so they'll be Fem Force Five, but until she finishes a couple more they'll just be the Fem Force Three. 

The chances of the terrorists sounding the alarm increased with each turn - roll a d6 and get a 6 on turn 2, get a 5 on turn 3, and so on.

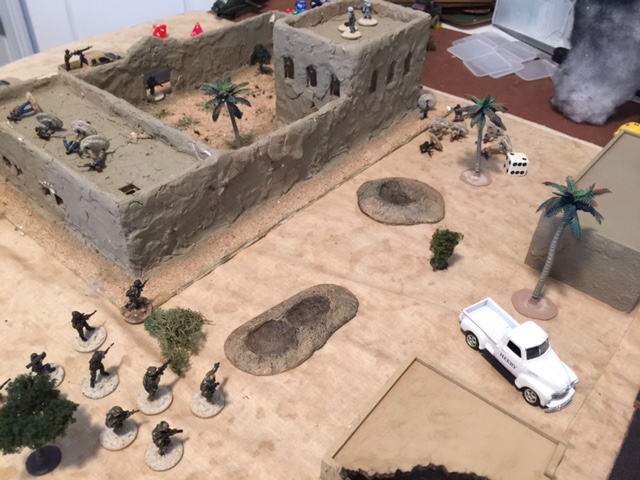
Here is the compound where we had just liberated the scientist over the dead bodies of his two guards. 

The plan was to take the back road and avoid detection.  The overwatch team began to move, but a unit on the roadside saw them, and we knew we were in for a long night. 


The overwatch team exchanged a round of fire with the enemy fire team that had identified them, and the whole neighborhood was alerted.  We shot all but the leader of the squad, but took a casualty of our own - one of our men was wounded but living.
That brought their reinforcements moving toward us.
The ensuing round of fire gave the overwatch team another casualty.
The overwatch team pulled back behind the corner of the objective building and made successful wound checks at the beginning of the next turn – no wound for one casualty, a light wound for the other.
The overwatch team quickly recovered and went on the offensive, laying low the enemy fire team blocking the transport team’s movement.
And both teams moved out of the target compound and into the street…
Another group of terrorists emerged to confront the assembled fire teams, but got shot down in short order.
Of course, this just brought more terrorists out of the woodwork…
Another terrorist cell encountered the firepower of the two fireteams, dropping a number of fresh casualties on the ground.
More importantly, however, we had to worry about enemies lying in wait on the rooftops along the extraction route.
The terrorists also got their act together and called in a technical that came barreling down the road.
The technical, however, didn’t last very long.
After picking their way through the neighborhood and several more exchanges of fire, they reached the extraction vehicles being guarded by Fox Force Three.
Post-script:  This was a closer game than the above report really shows.  On several occasions the advanced first aid chart that elite troops use in Force on Force saved the operators.  Both fire teams were slugging along with wounded troops and were a bad roll away from mission failure on several occasions.  I feel like this was about the limit for Troop Quality d10 regulars versus TQ d6 irregulars.  The game system really does balance differing troop types well.

Saturday, June 4, 2016

Batrep Roundup, 4 June 2016

Well, it's been a bit more than a week since my last Battles of the Week report, so this will just be a Batrep Roundup.  Lots of tabs to clear.

First things first - you should check out my Memorial Day game of Force on Force with the boys.  Set in modern Syria, with US special operators and Kurds making a lightning raid on a pesky GPS jammer that's holding up the bombing campaign against ISIS.
US operators departing the objective.
This AAR has also been added to my Force on Force:  Iraq (maybe it should be Iraq/Syria?) page and Force on Force:  Special Operations page.  Check them all out.

Here's what everyone else has been up to:

Winners of the Internet:  This title is temporarily held jointly by Kaptain Kobold for his superhero batrep focusing on Excalibur (extra points for semi-obscure comic title - I've got issue #1 in my closet) and Natholeon with the adventures of Delta Wave.

Sound Officer's Call has been busy.  Here's the second half of the Napoleonics report I highlighted in my last post.  Here's a 2-part World War II game with Germans and Soviets squaring off:  Part 1 and Part 2.  And a surprisingly good experience with Axis & Allies Miniatures.

Baron Von J has a neat battle report focusing on the French Foreign Legion in Mexico, where they have another opportunity to give their lives in a miserable place for the glory of France.

More outstanding LoTR from Into the Maelstrom.  And another battle in that game by Little Wars VA with some cool terrain pieces and about a hundred models on the field.

ForkusPrimordius has an Infinity batrep up, with some great modular terrain on display.

The Man Cave's gladiator campaign kicked off.  Not a genre I've ever played, but it seems one could have a good setup on the cheap.

Some gorgeous Advanced Song of Blades and Heroes over at Stalker 7's place.

Title of the Week:  The Conclusion of the Bloody Battle of Hacking and Slashig with some Roaring and Rolling of dice on the Kitchen Table.  Ha!  Site added to the blogroll.

Rabbits in My Basement has a modern Afghanistan AAR up.  And BIG Force on Force has a what-if violent Brexit game posted - here's the mission briefing and the gameplay.

Craig's got a game of Bolt Action up, with Free French versus Zee Germans.

The Fawcett Avenue Conscripts have several Necromunda games posted.  Very cool.

Here's some American War of Independence played with the Guns of Liberty rules.  I understand that the rules are due to be released by a commercial publishing house, looking forward to picking them up.

Preacher by Day has a couple more Pulp Alley games up - a VIP Escort and follow-on Investigation scenarios.

And finally, a Frostgrave roundup:  Two from Fencing Frog - Lair of the Ice Spider and The Hanghaied Princess; The Dark Templar suffers losses in a game that got nasty (discussing the probability curves of the Frostgrave rules and coming up wanting) and chronicles his warband's recovery; and one battle shown from three different perspectives - Illusionist, Necromancer, and Druid.

That's all for now.  I played another game with my boys last weekend that I've yet to write up, so check back in soon for the AAR.

US SOF & Kurds vs ISIS, Memorial Day 2016

To commemorate Memorial Day 2016, the boys and I set up a game of Force on Force set in modern Syria.  As recently reported in the news, US Special Operations Forces have been spotted near the ISIS capitol in Raqqa, Syria, aiding Kurdish fighters.  We joined them in spirit with a game of Force on Force.

Scenario:
The US SOF and Kurd operations against the ISIS capitol have been hampered by a GPS jamming device that degrades accuracy of GPS-guided bomb.  A platoon (-) of elite Kurds and accompanying US SOF troops are consequently conducting a lighting raid into a town near the suburbs of Raqqa to facilitate future JDAM strikes.  ISIS has been caught off-guard, while the US/Kurd troops plan to run the whole way, accepting penalties for moving beyond tactical movement rates (6" per turn).  The US/Kurd plan was simple - their left flank would assault the objective while the right tied blocked enemy reinforcements from interfering.

US SOF are TQ 12/Mor 12, Kurds are TQ 8/Mor 10, ISIS fighters are TQ 6/Mor 10.

Layout:
US/Kurd forces enter from the right side of the board as pictured below, the GPS jammer is located in the building in the lower left corner of the board.

ISIS to the left, US & Kurds to the right.
Looking down the US/Kurd right axis of advance - an ISIS checkpoint looms at an intersection.
US/Kurd troops on left axis of advance, heading for the objective.
Looking down the left axis of advance.
ISIS fighters guard the GPS jammer, shown in the building at left.  A technical and several ISIS fighters provide security.
Turn 1:
The US & Kurdish forces start their march down the board, putting effective fire on to all ISIS fighters who oppose.
US/Kurd forces move down the left axis off advance.
Kurdish technical gunner on the .50 caliber mounted in the technical wins initiative and lights up the ISIS technical at the checkpoint blocking the US/Kurd right.
ISIS checkpoint technical goes up in flames.
ISIS fighters get cleaned off of a rooftop when they try to engage the US/Kurd right.
Things were bad enough for the ISIS folks with the one-sided exchanges of fire.  They got worse when an initiative roll brought some tough love in the form of a Fog of War card.
The Fog of War card dictated that ISIS fighters were paralyzed by a command & control mix-up (perhaps a US deception or diversion?) and couldn't maneuver until after the end of the next turn - meaning that they were stuck in current positions until the end of Turn 2.  Both devastating to the ISIS faction and appropriate for the scenario.
The guys who drew the Fog of War card take some hits from US/Kurd small arms fire.
Turn 2:
In spite of their command & control paralysis, the ISIS troops received reinforcements - a handful of fighters show up at the GPS jammer site, hoping to keep the US/Kurd forces from reaching their objective.
More meat for the grinder.
The US/Kurd left moved forward and brought some enfilading fire on the ISIS checkpoint previously engaged by the US/Kurd right.  ISIS won initiative, but failed to connect with the US operators in the lead.  After drawing a Fog of War card, the US return fire proved deadly.

The Fog of War card draw gave the US/Kurd forces an unnecessary bit of reinforcement - an Uparmored HMMWV.
Always nice to have more friends like these.
Meanwhile, the US/Kurd right moved up to the previously-engaged checkpoint position and reduced further resistance.
The ISIS boys dropping like flies.
Dismounted US and Kurd fighters continued their sweep in the urban sprawl between their two flanks.

And another Fog of War card brought another Uparmored HMWWV for the US and Kurd troops.

Turn 3:
The state of affairs at the beginning of Turn 3.  The US and Kurdish troops have marched halfway down the board.
ISIS reinforcements brought a technical armed with a medium machinegun (PKM) directly at the US/Kurd right flank, prompting an exchange of fire that immobilized the Kurd truck and put the ISIS MG out of commission.

Follow-on fire from dismounted Kurds destroyed the ISIS truck.

Meanwhile, the technical at the head of the US/Kurd left moved within striking distance of the objective.  The ISIS technical rolled out to meet them but was quickly put out of commission.  The Kurd on the .50 caliber technical won an initiative roll against the ISIS troops on the roof of the objective bunk house and managed to take down all but one fighter... the fighter with the RPG...

...who managed to miss anyway.

Turn 4:
ISIS got a few reinforcements who tried taking on the Kurds at the destroyed checkpoint site.  It didn't go well for them.

The ISIS fighter with an RPG on the objective reloaded and tried to engage the US/Kurd technical again, but failed to make the initiative roll he needed... and paid for it.
Another one bites the dust.
Meanwhile, the US/Kurd troops advancing down the center of the board came up on the back side of the objective compound.  The ISIS troops that previously arrived at the GPS jammer site moved to confront them.  ISIS took heavy casualties.

Turn 5:
ISIS got more reinforcements, to include an additional machine gun.

The US special operators had by this time reached the objective building and made entry, quickly overwhelming the ISIS fighters inside.
Clear!
Turn 6:
The US and Kurd troops securing the back side of the objective had a final showdown with the ISIS reinforcements, which proved as one-sided as every other exchange of fire in the game...

...while the operators left a charge on the objective building to close out the operation.
Operators departing the objective as the charge goes off.
That wrapped things up pretty decisively and we called it a game.  I'm adding this AAR to the Force on Force: Iraq (yes, it's in Syria... close enough) and Force on Force:  Special Operations pages that chronicle my Force on Force battles.  Hope you enjoyed, and here's my belated thanks to all of those who have made the ultimate sacrifice in service of this great nation.

Sunday, May 8, 2016

Modern Battles of the Week, 8 May 2016

Doing things a bit differently this week.  I've got a few modern warfare AARs that I've been wanting to highlight, so I've split the battles into two entries:  this one for modern warfare, and this other one for fantasy, historical, and sci-fi battles.

First order of business is to add a new site to my blogroll, Hotel Zugando, where a 28mm scale modern wargame set in a fictional African nation is playing out with the Force on Force rules, the game that brought me back to wargaming after over two decades away.  Some AARs from that blog:
- Contracting Trouble, the ubiquitous Force on Force scenario, swapping CIA agents in for the contractors.  This was the first Force on Force game that I played, way back in my inaugural post.  And its been played and posted on the web by a number of folks:   DonoghDonogh reduxvon LuckyDan, and Dave.
- A Few Blocks of Hell, right out of the FoF book and  translated to an African setting.
- Closing Up Shop, another USMC-African rebel showdown with an interesting outcome.

Second on the to-do list is another addition to the blogroll, Rabbits in My Basement.  A couple of posts from this blog drew my attention - one with a day-long gaming session that starts with a Black Ops game set in Afghanistan, then a WW II Chain of Command, then Some Lion Rampant, and finally some War of the Ring action.  And a post where the author kitbashes FUBAR, Black Ops, and Chain of Command for a convention game set in modern Afghanistan.

And, here's a game trying to adapt a Vietnam scenario from Face of Battle into Force on Force, and struggling with the vehicle damage tables.  A common complaint that I houseruled into submission.

And though I've never played Buck Surdu's Combat Patrol, here's a write-up of a game set in Africa with a modern setting, and one set in WW II.


Tuesday, September 1, 2015

Library of Force on Force AARs

If you're reading this in the full web site version, you should see a listing, "Force on Force:  Theaters of Conflict."  Within each of these links is a brief description of the eleven Force on Force games I've played over the last year or so.  For those of you reading this in the mobile version of this blog, I'm duplicating the directory below:

Force on Force: Theaters of Conflict


Real life concerns - work, kids, and such - have brought a halt to gaming as of late, but I'd still like to get around to a Special Forces campaign set in Afghanistan and a campaign set in the Libyan revolution.  We'll see if/when I get around to those.

Enjoy the AARs!

Monday, May 11, 2015

KSK Recon Team Rescue, Afghanistan, 2005

Saturday night I ran a game of Force on Force at CSGA - what will probably be my last in Colorado.  Here's the scenario:
Paktika Province, 2005. A four-man German KSK reconnaissance team has been compromised in the hills of Southeast Afghanistan. Harried over difficult terrain and carrying one team member with a serious wound, the team has called for assistance and extraction. Air assets have yet to arrive due to weather conditions, but an 8-man US Special Forces ODA and an ANA platoon have almost arrived at the KSK team’s location at the end of a draw in the mountainous terrain. The ODA and ANA must save the KSK team before the Taliban can overrun the German position. US/ANA/KSK have initiative for the first round, subsequent rounds roll for initiative.
Here's the initial layout of the table, with a cul-de-sac of a valley terminating at a copse of trees where the KSK recon team (from Enfilade Figures, and just added to my collection) have taken cover:
The US Special Forces ODA and ANA advance into the end of the valley.  Local Taliban have assembled in the buildings near the mouth of the valley, while hardcore Taliban and some foreign fighters close in on the KSK position at the far end of the table.  The troops to the right of the vehicles are actually mounted at this point - we were just lining them up next to the vehicles to keep track of who was mounted in which truck.
The KSK recce team's position.  This counted as an 'excellent position' and gave an extra die of cover.  One figure is down in the background with a serious wound.
Hardcore Taliban (d6 Troop Quality, d10 Morale; regulars) assembled on a hill overlooking the KSK position, getting ready for a final assault on the infidels.
I commanded the four KSK operators (d10/d12) and the 30 ANA troops (d6/d8) mounted in four pickup trucks, two equipped with DShK machineguns.  Earle ran the eight-man Special Forces ODA (d10/d12), mounted in two uparmored HMMWVs.  Nick (of Little Nicky's Gameroom) commanded the 46 Taliban that covered the surrounding hills and manned buildings in the valley, which included a mix of hardcore Taliban (d6/d10), foreign fighters (d8/d12) and local Taliban that ran to the sound of the guns (d6/d8).  I should note here that the Enduring Freedom supplement for Force on Force provides a great rundown on the various forces in Afghanistan and theater-specific rules.
The ODA and their Afghan allies drive up the dry creekbed that serves as a makeshift road, under the watchful eye of several groups of Taliban waiting to open fire.

Turn 1:
The KSK went on overwatch while the relief convoy headed into the valley.  The Taliban commander wisely waited until the US/Afghan portion of the turn was over so as not to invite mass reactions from units with line of sight - reactions in the non-initiative phase of the turn are limited to units responding directly to fire against them.  Insurgent fire destroyed the lead ANA pickup and immobilized the rear vehicle.  A lucky US Fog of War card brought a General Purpose Machine Gun (GPMG) team on to the battlefield at the rear of the convoy.


The KSK recon team fell off of overwatch but nonetheless inflicted a number of casualties on two squads of hardcore Taliban and took none in return.  When a squad of foreign fighters opened up, however, all three of the KSK operators went down as casualties.  The foreign fighters took casualties of their own, however, and retreated back to cover.
Taliban casualties (minis laid on their sides) stack up as the KSK recon team proves its mettle against vastly superior numbers.
Turn 2:
The lead SF vehicle began to inflict casualties on the local Taliban manning nearby buildings, and the GPMG team and ANA that dismounted from the immobilized rear pickup wiped out the Taliban in the nearest building.  A pair of RPGs launched at the lead SF HMMWV, one of them hitting the mark and immobilizing it.  The Taliban foreign fighters peeled off to the sides of the valley, hoping to close with the infidels and their lackeys in a double-pincer move.
The US GPMG team and an ANA squad combine their fires to wipe out a squad of Taliban.
Turn 3:
The US forces retain the initiative.  Three of the four SF operators in the lead uparmored HMMWV dismount from their immobilized vehicle and, with their small arms and the .50 caliber in the turret, wipe the remaining hardcore Taliban squad from the hill overlooking the KSK position.
A whole squad of hardcore Taliban fall to very effective SF fire.

An ANA squad advanced between two buildings to counter one of the foreign fighter squads - the ANA won initiative and fired but failed to inflict a single casualty.  The foreign fighters returned fire and wiped out the ANA squad to a man.
My ANA don't fare well when they mix it up with some d8 Troop Quality foreign fighters.  As in, they all get shot.
Meanwhile, a combination of SF and ANA fires and a Fog of War-induced explosion take out all of the local Taliban in the two buildings furthest in to the valley.
Local Taliban fighters on these two buildings get wiped out.  Just above and to the right of the far building, the other squad of foreign fighter Taliban continue maneuvering to the fight.
Lead SF operators and an ANA squad in the thick of the fight.
 The other foreign fighter Taliban squad continued its march around the far side of the valley, hoping to intercept the trail SF vehicle and ANA as they advance to the KSK position.
Foreign fighter Taliban hug the side of this compound, waiting to fire on the SF HMMWV in frame as it advances to the KSK position in the foreground.


Turn 4:
By now a gang of local Taliban reinforcements had arrived, but none with leaders.  A mob of them - fifteen or so - sat at a Hotspot in a field, but failed to get into the fight.  While the US and ANA maintained the initiative, the Taliban foreign fighters waiting for the remaining mobile SF HMMWV to advance scored a hit and destroyed the vehicle.  All inside passed their casualty checks however, and an ANA element conducted a rapid move to exchange fire with the ambushing foreign fighters.  A Fog of War card gave the Taliban an off-board sniper team with insane firepower, which they promptly put to good effect by wiping out the US GPMG team.

Turn 5:
At this point, the US and ANA players conferred and agreed that the original game plan was dead - there were no functioning vehicles, and they wouldn't be able to extract the KSK casualties at all.  The priority became garrisoning the buildings in the valley and securing the KSK operators and holding out until help came, at the cost of scenario victory points.

Accordingly, the trail SF team moved to the KSK position and exchanged fire with the second to last group of foreign fighters, making casualties of all of those Taliban.
The trail SF team is visible in the copse of trees where the KSK team had sought cover.  The foreign fighters they smoked are obscured by the ... ahem... smoke of the burning building.  SF and ANA forces have moved in to the building at the left of the frame and are about to open fire on the foreign fighters just outside, a killing blow to the Taliban.

The lead SF team and the remaining ANA squad then advanced into a building and opened fire at the foreign fighters immediately on the far side, wiping out those Taliban.  This served as the coup de grace - the Taliban had no remaining leaders and no hope of overwhelming the US and ANA forces.  We called an end to the game.
The state of the battlefield at the end of the fight - vehicles burning, casualties everywhere.  Both sides content to hold their positions.
We didn't bother to tally up victory points - I had botched the US victory points and hadn't put in any for inflicting Taliban casualties - so as written, this was a clear victory for the Taliban on scenario points.

Closing Observations:
- The scenario victory points need to be amended to give some (not a lot) points to the US/ANA for inflicting casualties on the Taliban.
- The US/ANA commanders should have given up on a full evacuation of the KSK team from the battlefield sooner.  The casualties piled up quickly on both sides, and there was no way to get everyone out.  Better to seek a more modest goal when the initial plan fizzles.  As Mike Tyson said, "everyone's got a plan until they get punched in the face."
- The disparity between Troop Quality levels proved decisive throughout.  Whether it was SF operators wrecking Taliban, or foreign fighters wrecking the ANA, I've never seen a battle where so many elements were wiped out wholesale.  An interesting opportunity  for commanders able to pair up their strengths with their enemy's weaknesses.