Sunday, October 23, 2016

Orcs vs Humans vs Elves & Dwarves, Magic Treasure Hunt

Once again we journey to the Darkened Wood, where our ongoing campaign pits many factions against each other for control of this enchanted region.  All games are played with the Savage Worlds Showdown system, which has proven remarkably adaptable as a universal skirmish mechanic.

In our last game, the human rebels seeking to overthrow the likewise human king of the lands bordering the Darkened Wood ambushed the king's brother, the king's head tax collector, hoping to secure royal blood for a royal ransom.  The gambit failed when the tax collector fell victim to a stray shot (parallel to a modern African mercenary game also played with the Savage Worlds Showdown sytsem, likewise seeking to kidnap a VIP, I played on the same terrain) and the result was a bloody mess.  The leader of the tax collector's bodyguard, Captain Trent, barely escaped with his life.

Now, Captain Trent seeks to redeem himself.  The Darkened Wood seems to attract strange stones that fall from the sky, and a large one just did so, breaking into several pieces as it impacted.  The stones are useful to magicians, tend to glow green, cause hair loss and burns/lesions on the skin, and are highly prized.  The king directed Captain Trent to get as many of the meteor fragments as possible, with hopes of attracting a mage-for-hire to the king's retinue.

But Captain Trent faces opposition.  A group of Orcs, and an opposing coalition warband of Elves and Dwarves, also want the valuable stones.  Looks like we'll have a contest for the precious magic treasure!

Overhead view of the table.  Captain Trent and the humans at bottom left, Orcs at bottom right, and Elves/Dwarves at top right.

The Orc line, a few in the center protecting the shaman, Goblins at far end to serve as a meat shield from Human arrows.

Human forces under Captain Trent.  Archers, swordsmen, and warriors with spears.

The Elf/Dwarf coalition.  The Elven archers on the far end intend to go the hill in the background and command as much of the field as possible with their arrows.

First turn, Humans moving out toward the Goblin line.
The Elven archers move to the hilltop as planned.
The Orc horde pushes forward, as a lucky arrow wounds the Orc chieftain.
The Orc shaman moves to a hilltop for a vantage point from which to cast his dastardly magic.
The Orc shaman's spell is right on target, dropping a blast of energy on the advancing Elf/Dwarf unit and wounding or shaking all of its members, including the Dwarven mage and Elven chieftain.
Arrows rain down on the Orc shaman's group, but his bodyguard serves its purpose and soaks up the damage.
Mid-way through turn 2, view from behind the Human units, which are advancing on all sides.
Sustained arrow fire has depleted the Orc shaman's bodyguard; no one else to soak up the deadly Elven archers' volleys.

Turn 3 starts, and the Orc and Elven chieftains meet in the field in between their respective lines.  The Orc chieftain lays low his Elven counterpart.
Close-up of the Elven leader's fall.
View from the Human left flank.  The humans have yet to engage in any combat save a few arrows fired at the Goblin line.
The Dwarves advance toward the Orc chieftain, hoping to avenge the death of the Elven leader.

Turn 4:  The Orc shaman dishes out another magical blast that wrecks the Dwarven unit, with minis knocked over in the far right of this view.
The Orc and Dwarf mages exchange blasts at each other.  The Orc mage gets lucky and avoids getting blasted here.
A line of Human archers keep the Goblins at bay with a flurry of arrows, inflicting some casualties.
The Orc warriors advance across the field to confront the remaining Elven and Dwarven fighters.

Turn 5:  The Orcs and the remaining Elves and Dwarves collide in a vicious scrum in the middle of the battlefield.
The Orc shaman falls to an arrow fired by the Elven archer in the middle of the field in front of the hilltop where the Orc had been perched for the game up to this point.
As the Orc and Elf/Dwarf warbands clash in the background, the Humans are successfully carrying off the glowing green rocks without any opposition.  The screen of Human archers, front right in the picture, keeps both Goblins and Elves at bay.
Goblins have successfully retrieved a magic rock and are moving out of the woods with it as their Orc brethren clash in the background with the Elves and Dwarves.
The Goblins carrying the magic rock out manage to avenge the Orc shaman's death by cutting down the Elf that shot him down.  The bodies continue to pile up in the big clash in the background.
The Human archers even bested their Elven counterparts, who had rained death on the Orcs all game long!  By this point, the Humans had moved all but one of the meteor fragments to the board's edge.
The game's parting shot:  while the Humans were busy grabbing all of the magical rocks, the Elf/Dwarf coalition and the Orcs inflicted horrible casualties on each other.  The Orc chieftain barely escaped with his life.

This game proved a clear Human victory.  They ran off with four out of five magical rocks and suffered no casualties.  The Orcs grabbed one rock, the Elf/Dwarf coalition none, and both of those factions took heavy casualties.  Perhaps this windfall will allow the Human king to hire a mage and match the other factions in the campaign with some magic of his own.

Tuesday, August 9, 2016

Battles of the Week, 9 August 2016

Sorry, no games to post over the last couple of weeks.  Been busy, but I had the chance to finish painting a few minis:

The minis are from Enfilade Figures' insurgent range.  It's good to have some dudes with AKs that aren't too Middle Eastern-looking and could probably be tough guys from anywhere.

I was delighted to find someone else playing a game somewhat similar to my Modern Warfare:  Alien Invasion campaign.  Dust, Tears & Dice has a game posted with near-future Russians fighting off alien battle droids.  Very cool.

Bob in Edmonton has a Black Ops game up set in the Prohibition Era, with G-Men and gangsters facing off over an illegal liquor still.  I may need to pick up that rule set, if just for the stealth infiltration aspect.

World War II roundup:  some Battlegroup Overlord at This War Without an Enemy, Sound Officer's Call has a Historicon game of Battlegroup:  Kursk posted, and Craig has a whole tournament of Flames of War from Panzershrek 2016 posted - Game 1, Game 2, Game 3, Game 4, and Game 5.

Big Lee has a massive Romans versus German barbarians game up, you should check it out.

Sediment has an ACW game and a Cold War gone hot game posted, both good reads.

Rabbits in My Basement has an old-school Afghanistan game up, and there's some WH40K over at both Fawcett Avenue Conscripts and Tim's blog.

Fantasy battles:  Fencing Frog has some Dragon Rampant posted, here's a Frostgrave battle from two perspectives - Stanley's and Mike's, and a very positive review of Age of Sigmar from Little Wars VA, a Games Workshop skeptic (I'm in the same boat).  I doubt that I'll get into the game, but it's promising that GW appears to have made an effort to fix chief complaints about overcomplicated rules and being unresponsive to player input.

Monday, July 18, 2016

Battles of the Week, 17 July 2016

Before I get to the week's battles, I owe a pitch to the game I played this weekend, a modern action involving some mercenaries trying to kidnap an African colonel to facilitate the rescue of western executives held hostage by a despotic regime.

Read the whole thing.

In a related vein, Band of Wargame Brothers has a modern African campaign playing out here:  Part 1 (setting) and Part 2 (gameplay), using a combination of the Force on Force rules that I enjoy so much in combination with other modern rules.  Big board, very cool.

Preacher by Day has a Pulp Alley game posted, a unique diplomatic/social contest.

Hook Island has some Hail Caesar! posted, with Greeks versus Persians in a battle from antiquity.

Campaigns in Miniature has a report on a Flames of War tournament.

Kaptain Kobold has some Saga action with Anglo-Danes, Welsh, and Normans squaring off.

Into the Maelstrom has some Napoleonics posted, pretty cool pics.  And some Warhammer 30k posted, too.

Until next week, happy wargaming!

The Zamunda Gambit, Chapter 1: Kidnap Colonel Masondo

My latest campaign, first chapter here, follows a group of Private Military Contractors (PMCs) on a mission in the fictional African country of Zamunda.  Yes, that Zamunda.  The OILCO Corporation, one of several firms owned by Mortimer and Randolph Duke, has had its assets and facilities in Zamunda seized when King Akeem was recently assassinated and replaced by his longtime friend and adviser, Finance Minister Semmi.  A number of senior OILCO executives were taken hostage, and the wily OILCO leadership hopes to rescue them with the assistance of a kidnapped senior official, much as was done in the Gran Sasso Raid or Operation Entebbe.

OILCO hired mercenary firm Extremis Operations Group (EOG) operatives based on their past success in rescuing an endangered executive in Nigeria as the Nigerian Army and Boko Haram were waging war.  The plan was to ambush a convoy escorting Colonel Felix Masondo on a journey in the lightly-forested grasslands to the West of the capitol.  Unfortunately, the EOG team didn't have time to set in an IED or Claymore Mine to knock out the first vehicle.  They would have to use small arms and the one operative who had an M203 grenade launcher might also be able to do it single-handedly.

I played this scenario with the Savage Worlds Showdown tabletop miniature rules, on terrain strongly resembling that of the fantasy scenario I played last weekend, where forest rebels sought to kidnap the King's taxman cousin, only to see the kidnapping target felled by a stray arrow.  Can I escape this trap of trying to kidnap someone, only to end up shooting them in the face?  We'll see...

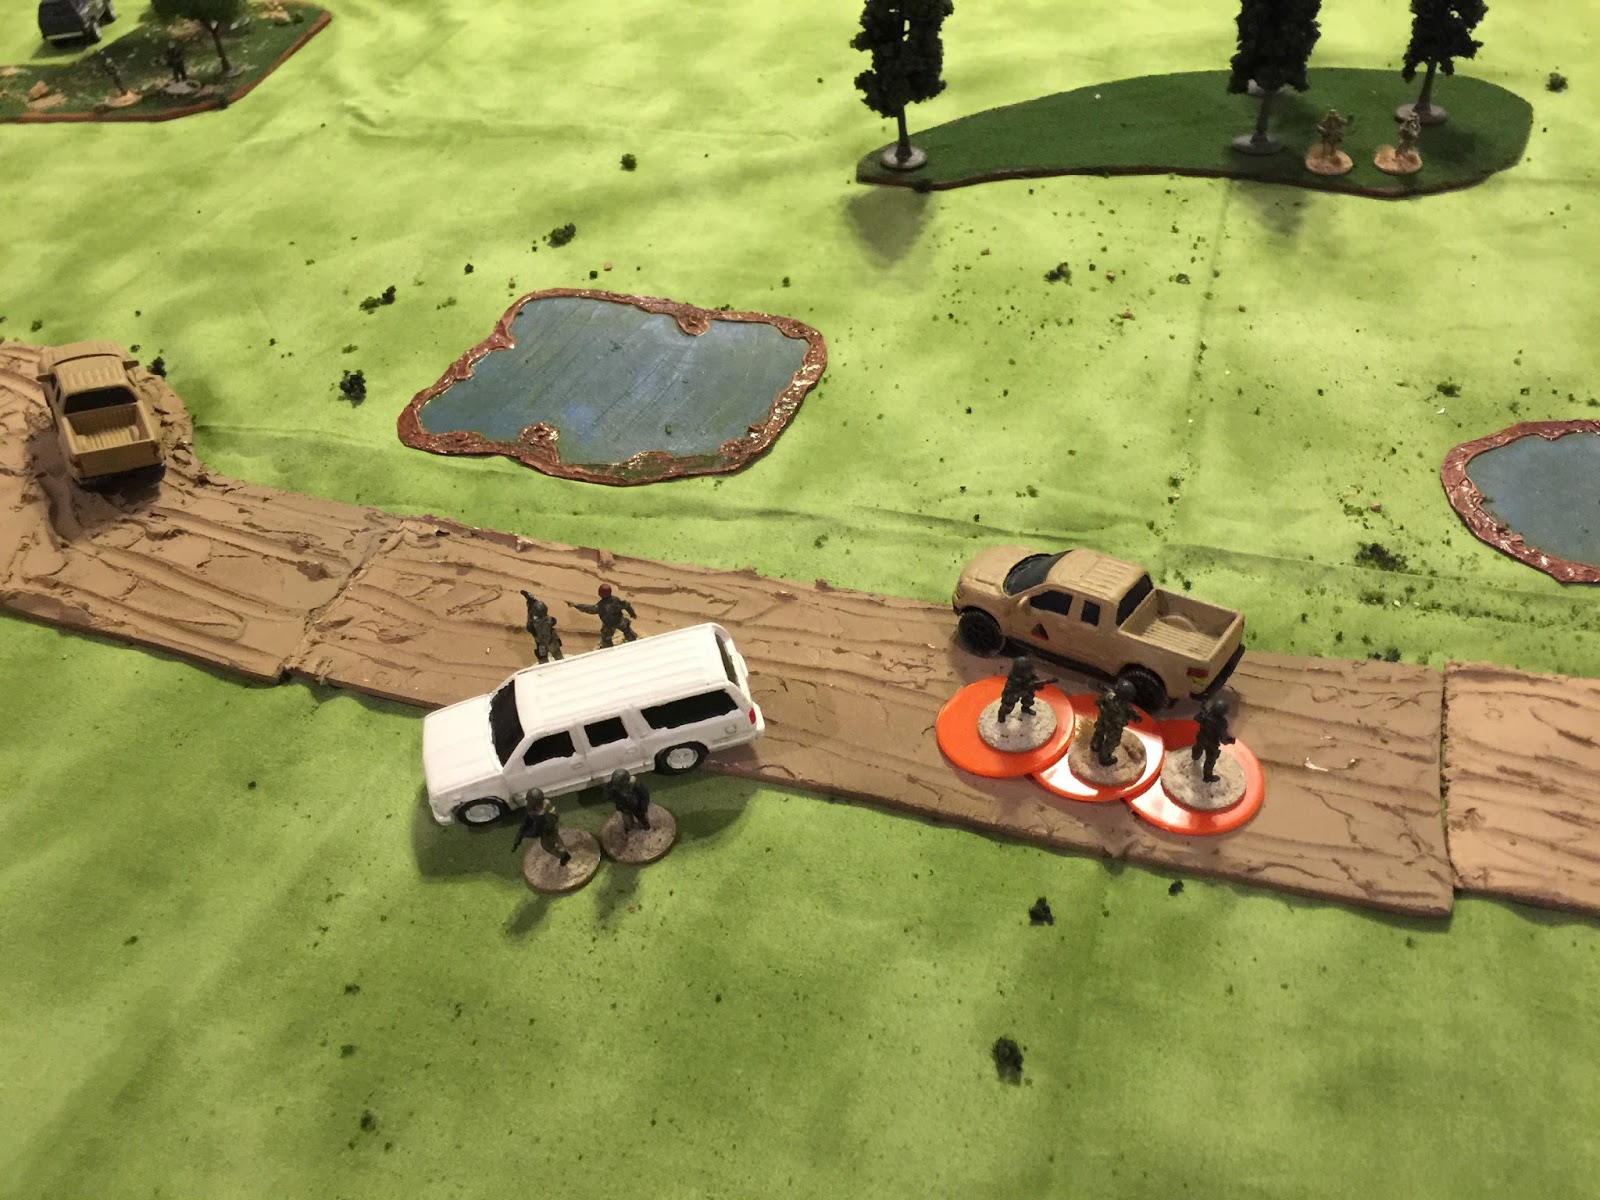
Off to the ambush!  Below, Colonel Masondo's convoy trundles slowly on the rutted, uneven terrain of a soggy dirt road.

Perspective from an angle - EOG operatives lie in wait in the copses of trees.

Here they hit the kill zone.  It's about to go down.

Before we start the ambush, here's each vehicle with the troops inside in a row to show who's in the fight.

Lead truck:  6 Zamundan Army soldiers.

Middle SUV:  Colonel Masondo and three western security contractors with the same level of training and equipment as the EOG operators.

Trail truck:  6 more Zamundan soldiers.

The EOG operators.  Six trained and battle-hardened special operations veterans hoping to wipe out the escorts and make off with Colonel Masondo without any casualties of their own.  All they have to do is make a good shot with the first M203-launched grenade.

Oh no!  They roll a 2 and shank the initiation of the ambush!

A ridiculous miss this was, hooking far left of the target.

The lead truck, however, didn't escape harm at all.  Small arms fire from three EOG operators killed 5 of 6 vehicle occupants and left the other shaken (two leftmost minis represent soldiers in the cab of the truck, the four to the right are in the bed).

The trail truck fared much better, with only half of the occupants hit by small arms fire.

The dead and wounded drivers, along with small arms fire that take out one of the SUV's front wheels, force all three vehicles to the side of the road and able-bodied occupants quickly dismount to seek cover elsewhere.  The three Zamundan soldiers at the trail truck are shaken from the casualties their unit sustained.

The EOG operators at the M203 position see the security contractors dismount from the driver's side of the vehicle and take them out with accurate fire.

On the passenger side of the vehicle, the lone western contractor guarding Colonel Masondo does what he's trained to do.  He lays down suppressive fire on the ambushers that he can see and moves the principle to cover.

Medium blast template covers the EOG operators targeted.  I was underwhelmed by the effects of suppressive fire in this instance.  Not sure if these rules get it right.

Masondo's only surviving western PMC guard then turns his attention to the flank EOG position as one of the Zamundan soldiers is picked off.

Meanwhile, the EOG operators from the M203 position at the front of the convoy race from cover and open fire on the two unharmed Zamundan soldiers from the rear.

The Zamundans go down, leaving only the western security contractor to get Colonel Masondo out of this mess.  The two EOG operators at the flank position take aimed shots, and with their optics, on a d10, only a 2 will miss, and only a 1 will mean hitting Colonel Masondo instead of the last remaining security contractor.

Two ones!  Colonel Masondo goes down hard!

Masondo takes a dirt nap...

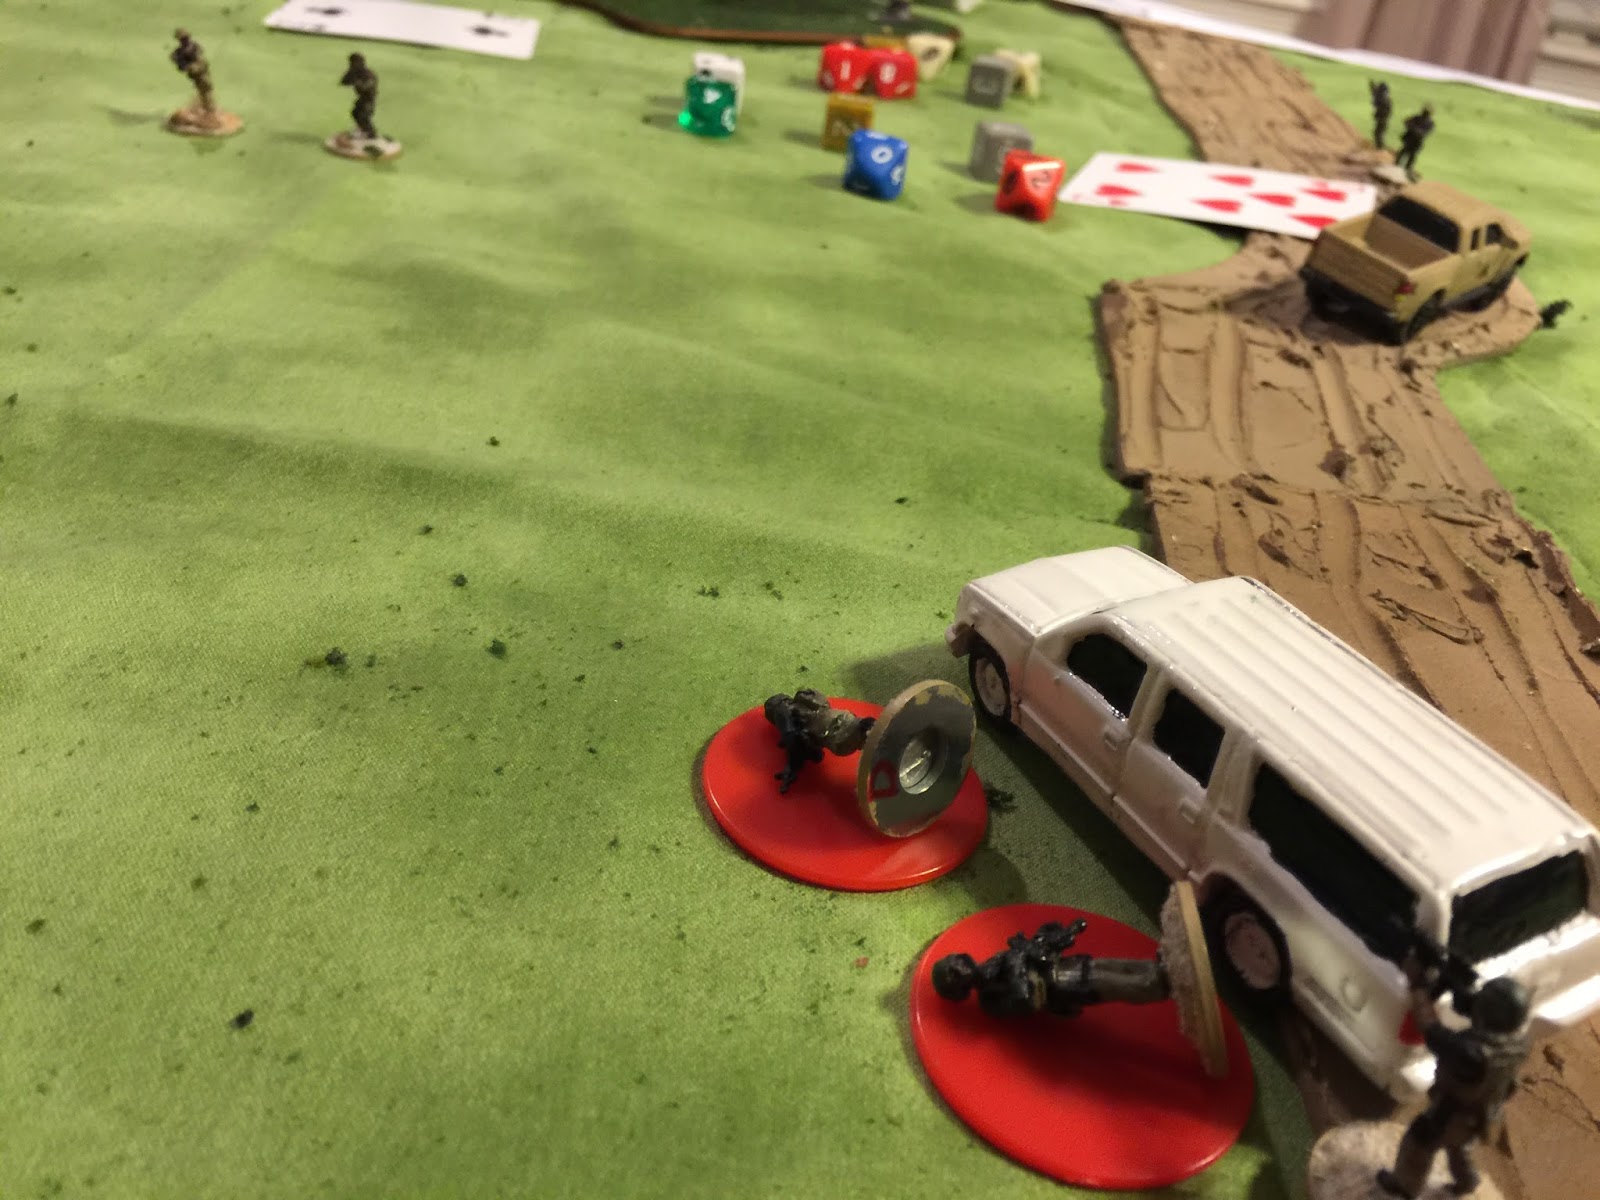
Return fire from the remaining contractor leaves one of the EOG operators shaken (orange token).

As if on cue, the driver of the trail vehicle comes out of his shaken status, exits the vehicle, and opens fire on the flanking EOG position.

A lucky shot!  The other EOG operator is killed!

Of course, the two EOG operators outflanking the last security guard are still approaching...

...until that last security guard wins initiative and smokes them both!

As this is going on, the surviving EOG operator at the flank position drops the driver who had killed his EOG comrade in arms.  The EOG operator then fires at the last opposing soldier, only to have it bounce off of the contractor's ballistic plate carrier.

As the surviving western security guard turns to fire on the EOG flanking position, the other two surviving EOG operators flank him...

... and shoot him down!

Post-battle casualties with red tokens...
...I see dead people.

AAR/Postcript:
1.  Well, this went exactly how I didn't want it to happen.  The same way last week's game went, where a planned kidnapping resulted in the death of the kidnapping target.  Not sure how I break this curse, but the dice have been harsh on VIPs lately.

2.  I'm still working out the kinks on the Showdown initiative system, which is card-based.  It definitely gives an order to who moves, first to last, but it's randomized unless you pay for a unit/character trait that permits drawing two cards and picking the best one, or getting a re-draw if below a certain level.  It certainly creates a feeling of a fog of war, but I don't think it takes into account the effects of leadership and decision cycle advantages that make aggressive leaders, fighters, and units successful.  More to follow as I continue to develop my own rules that take this into account.

3.  I screwed up the armor protection in this game.  I used the modern light armor instead of the heavy armor, which does have the ability to stop 5.56mm and 7.62mm rounds.  I should have priced out that body armor for equipped minis, and rolled to see if it stopped covered hits (percentage of body protected).  Instead, I had the effect of pistol body armor in a rifle-equipped battlefield.  Having said that, the Showdown system seems to be a pretty solid universal skirmish system, which is quite extraordinary.

4.  Well, this was a hell of a start to a campaign.  I'll take a hard look at OILCO options for follow-on operations after this initial failure.