Tuesday, May 23, 2017

Frostgrave Campaign, Game 2

I had a great time in the first game of the Frostgrave campaign I'm in.  For the second game, we played a three-player version of the scenario 'Genie in the Bottle,' where a Genie is hidden in one of the treasure chests the three treasure hunting bands are after.


Here's my warband, made up largely of Reaper Bones Dwarves:
From left to right, the Apprentice (still needs a name), the Gimp, my Wizard (an Elementalist whom I still try to resist calling Stumpy Gandalf), Erik the Beserker, an Orc Barbarian I hired with the proceeds from the last game, Freya, Bobbins the Thief, Callie the Archer, and Dain Deepaxe.


The other two warbands (I apologize for not having pictures) belong to Tony, who has an Illusionist band composed of a Cthulu-esque mind-flayer Wizard and undead/creature minions, and Marc, who has also has an Elementalist warband that includes some delightfully appropriate snowman monsters from the movie Frozen.


We started off in three different spots on the edges of the board, with a number of treasures set upon the table among ruined buildings.


My warband started off opposite and in view of Marc's.  I immediately fired off a shot each from my archer and Wizard and took down one of his fighters...
...and Marc's Wizard put up a wall to prevent taking more casualties.
My Apprentice and some minions advance on my left.
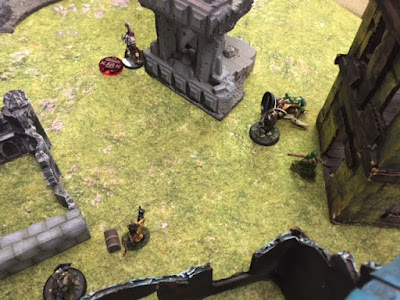
Top view.  My band is at bottom left, Marc's on the right with his Frozen abominable snowman, and Tony's band is at the top of the frame.
Marc's snowman, with some of his and Tony's warband exchanging fire through the back side of this shot.
My band changes direction to get around the old hollow tree stump and toward some treasure and Marc's band.
Another top shot.  My band continues to advance from bottom left.
Tony's band advances to take a treasure away.  His Wizard and Apprentice are at the back, his snake woman archer at left, Templar rounding the corner, and a skeleton minion at front.
I continue my advance.  My orc barbarian is rounding the tree stump to take the fight to Marc's band, while my Apprentice runs off to the left for some treasure.
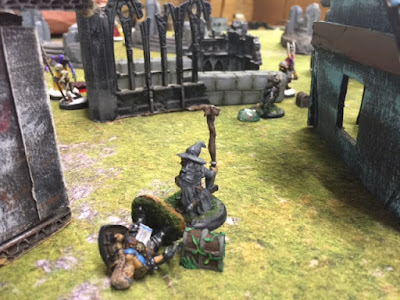
Bobbins, my Halfling thief, is making off with some loot, while my Apprentice is advancing in the background.
The orc barbarian advances, with Dain backing him up.
Marc put up a Wall spell, but the barbarian and Dain advanced beyond it to close the distance.
View from the far side of the table, where Erik has caught up with a treasure-laden skeleton.
Meanwhile, the Gimp has a treasure in hand while the Apprentice advances.  I should note that the Apprentice is trying to cast spells constantly by this point, and steadily failing and bleeding health.

And then, Marc manages to get a thief on top of the tower at center of the table.  He opens it up, rolls for results, and...
The Genie is loose!
The Genie and Marc's thief square off on the top of the tower.
Meanwhile, Marc's archer lands a lucky shot and takes out Tony's Apprentice.
My orc has closed the distance, and Dain is not far behind...
Marc's thief miraculously won combat against the Genie and pushed it back, forcing it to fall from the top of the tower.  Unfortunately, Stumpy Gandalf is the closest mini and will be the next object of the Genie's affections... unless, that is, he can successfully cast a Bind Demon spell.  I was lucky enough to pick up a Bind Demon Grimoire last game, and learned the spell.  I cast the spell and cut myself enough to be wounded, but succeeded in binding the Genie!
Meanwhile, my Apprentice finally succeeded in casting Elemental Bolt, blasting the (now absent) Wizard from Tony's band out of his shoes.
Marc has taken casualties from the Orc barbarian and Dain's assault.
The Gimp scrambles off with treasure...
Before falling to enemy fire, one of Tony's Illusionists cast a mind control spell on Erik the Berzerker, and Freya had to engage him in combat.  This spell has proven particularly meddlesome.
My Orc and Dain continue their combat, now joined by the marauding Genie.
Freya has triumphed over Erik, and now Tony's archer is assailed on three sides by members of my band.
Oh noes!  My Orc falls to one of Marc's band.
Tony's archer finally falls to the combined weight of three of my warband.
There are now fewer opposing members of Marc's band left standing now, but he still has minions carting off treasure chests.
...minions that the Genie, under my control, can chase down.  Here's his last henchman, an archer trying to husband off the last bit of treasure.
...not anymore.  The Genie fires off a missile attack and takes him out.

And with that, neither Marc nor Tony had anyone left on the board.  All treasure remaining was mine by default.

This was a pretty solid game from my perspective.  It turned strongly in my favor when the Genie came under my control.

Post-game report:

The barbarian recovered from his wounds fine, but Erik the Beserker was dead.  I spent enough gold to buy another man-at-arms to replace him.  I managed to gather up 570 gold from the treasure collected and what I had last time, and bought my archer a magical +2 bow.  I secured a potion of healing for the Apprentice, who could have used one this game.  I also raised Health one point, learned Control Undead from a Grimoire collected, and added a point each to the Elemental Bolt, Wall, and Steal Health spells.

Will post game 3 shortly, stay tuned!

Wednesday, May 17, 2017

Upcoming Modern Game - DEFCON ZERO

If you visit this site regularly, you've probably noticed that my modern war gameplay has dropped off a bit.  Even though I've got a full portfolio of Force on Force AARs posted - Iraq, Afghanistan, Special Operations, Libyan Civil War, and other posts - I've since branched out into Savage Worlds Showdown, Frostgrave, gotten back into Warhammer 40k, and started work on my own d10 Gunfight system, among other things.


But for the first time in a while, I'm excited about modern wargaming again.  A new modern wargame, DEFCON ZERO, is coming out soon.  I just listened to a podcast with one of its creators, J. Reid Denton, where he said a lot of things that have me excited about the game:


1) Activation.  Though the details aren't clear, I'm heartened to see that it won't have a card activation system.  As Mr. Denton puts it, card activation is too random.  I agree, and from my point of view the ability to activate quicker than your opponent, and to sequence events (establish support by fire, maneuver into the assault), is as valuable a skill as shooting accurately or swinging a sword.  And it sounds like DEFCON ZERO will make an attempt to allow for action and reaction without devolving into an infinite reaction chain (as is possible in Force on Force).  Denton has a military background, so hopefully his views on activation translate into realistic and functional command and morale mechanisms as well.


2) Realistic Ranges.  Let's be honest.  A 24" range for rifles is stupid, if you care in the least about realism.  A 24" close range, with modifiers beyond, makes sense.  Apparently DEFCON ZERO will bring with it realistic weapon ranges.  Good to hear.


3) Covert Intervention Games, the producer of DEFCON ZERO, is producing the excellent Elhiem range of miniatures, and adding to that line with zombies and armed civilians.  Seriously.  Go check it out - they've got a pre-packaged US Army infantry platoon set up.  I've got some armed civilians I'm painting up now, pretty excited about it.


4) It's in the right scale.  The minis are 20mm or 1/72, which is a good scale for any skirmish up to platoon-sized game with any firearms.  Anything bigger doesn't make sense (though I put up with 40k because of the unparalleled fluff), and 15mm minis just don't look good in my opinion.  And the scale works well for a 12" = 25 yards/meters.  At that scale, small arms ranges make sense - a 4' x 6' table with some cover provides enough ranges for small/medium/long contrasts to become clear.


5) Modern Pulp/near future sci-fi is going to follow as a build-on to the modern combat system.  It's a special operations/Men in Black/psyker magic setting.  Looking forward to seeing how that shakes out.


All of this goes to say that I'm very excited about what comes next.  I've signed up for their 'Inner Circle' program and hope to be part of the Beta test for DEFCON ZERO - go check out their website - and am looking forward to some rules as an excuse to break out my 20mm modern minis and throw down.  Go check out the podcast and see if it fires you up, too.

Tuesday, May 16, 2017

d10 Gunfight - The Theory

I'm finally delivering on my goal of writing a set of skirmish rules based on the 10-sided die.  I've added this to the side scroll at right, which is only visible in the Full Version of this blog (sorry, Mobile Version readers) but also linked here.  Call it a Vision Statement, or simply the theory of what I want the game to do - accurately, but simply, represent the dynamics of gunfights between small groups of opposed factions.


d10 Game Theory
d10 Gunfight is a skirmish game meant to capture the dynamics of small-scale gunfights.  Two things that define gunfights are:  (1) the balance between shooting fast and shooting accurately; and (2) shot placement serves as the chief determinant of a bullet's effectiveness.  In detail:


1.  "Fast is fine, but accuracy is final." - attributed to Wyatt Earp
Shooting a firearm, particularly a handgun, requires a balancing act between shooting fast and shooting accurately.  The Shoot statistic that each model uses represents the ability to shoot at combat speed, under stress, in a two-way live fire.  Accuracy can, however, be sacrificed for speed.  Whenever a model engages in combat, an opposed reaction roll determines the order in which actions occur, higher roll wins.  A model can, however, trade accuracy for speed.  To do this, a player declares that the model is trading up to 2 points of accuracy for speed, and adds 2 to the model's reaction roll.  The same model, however, whether it wins or loses the reaction roll, will subtract 2 from its to-hit roll against a range-dependent Target Number.  In other words, a model can shoot up to 20% faster for a 20% loss in accuracy.


2.  Shot placement is king.
The placement of a shot, more than caliber, determines the damage that it delivers.  The bullet is going to do what it is going to do; the only thing that makes it effective is where it hits.


In d10 Gunfight, to-hit rolls are made against a range-dependent Target Number.  Damage is constant for a weapon; if a shot hits, the Damage value for the weapon is added, but no additional damage roll will be made.  Damage is determined based on the Modified To-Hit Roll (MoTHR), created by the rolled d10 value as modified by the shooting model's Shoot value as well as reaction, cover, and movement modifiers.  If the to-hit roll is equal to or greater than the range-dependent Target Number, the Damage value of the weapon is added to the successful shot. 


Example:  Dirk shoots his 9mm pistol (Damage 2) at a target 12" away, which is at Medium range.  The Target Number is 7.  Dirk has a Shoot value of 3.  Dirk does not trade any of his Shoot value for increased reaction speed, and wins the opposed reaction roll.  Dirk rolls a 5, and adds 3 to the roll for a MoTHR of 8, one above the required 7.  Dirk then adds the pistol's Damage of 2 for a total damage of 3 (1 over Target Number plus 2 Damage value of the weapon).


Stay tuned for more as I develop the game, including detailed test-play explanations.

Frostgrave Campaign, Game 1

I've really enjoyed the games of Frostgrave I've played, so I jumped at the chance to enter into a Frostgrave campaign at my local game store, Augusta Book Exchange.  Two other players and I started out our Wizards, Apprentices, and henchmen to see what wonders the frozen city could provide for us.  My Wizard is an Elementalist, and I'm playing with collection of (mostly) Reaper Bones Dwarves.


Here's my band:
From left to right:  Freya (Infantry), Erik the Beserker (Man-at-Arms), Apprentice (needs a name), Wizard (fighting the urge to call him Stumpy Gandalf), Dain Deepaxe (Man-at-Arms), Callie (Archer), Gimp (Thug), and Bobbins (Thief).

My opponent for this game, Tony, has an Illusionist, and his Wizard and Apprentice are very appropriately Cthulu-esque mind flayers, with Orcs and other creatures as henchmen.

The board for Game 1, The Mausoleum:
View from my edge of the board.  Mausoleum represented by the four stone walls in a rectangle at center.  My Wizard is at left and is advancing, with Apprentice on right.

The board starts with four skeletons on it that will attack the nearest visible target, and the Mausoleum dispenses another skeleton every turn.
View from behind my Wizard as henchmen advance toward visible treasure.
View from behind my Apprentice.  Thug and Man-at-Arms on left, Archer on right.
Archer stepped into a building and took a shot across the field that missedits target...
...and was attacked by a skeleton!
Freya and Erik advanced toward some treasure, only to have a skeleton close the distance and attack...
...but Dain pitched in to lend Freya a hand, and they quickly dispatched the foul thing.
My Apprentice ran to Callie's aid...
...and is laid low by the beast for his troubles!
And Callie promptly returns the favor...

Least dramatic moment of the evening - my Thief grabs the money and runs, and no one stops him.

Here you can see the opposing side creeping up to the edge of the Mausoleum.  My Wizard moved away from a skeleton and cast Strength on Dain to make him pretty formidable in melee combat (clear token next to him to signify this), and Freya has secured a treasure chest.
A better view with the opposing party visible.  Tony's Apprentice is at left in the yellow robe, his Wizard at right with the staff.  His Orcs and Warhound continue to advance.
I start my retrograde off the field as we start to collect some treasure.  Wizard Stumpy and Freya step back a bit as Dain hauls off to deal with a skeleton in the background.
A real fight has broken out around one of the treasures next to the Mausoleum.  Tony's Templar and Warhound face off against Gimp and Erik.
Tony's Warhound takes a hit and gets pushed back.
Disaster!  The opposing Apprentice cast Mind Control on Freya, rolled a natural 20, and gets ready to use her to bash Stumpy's head in!
The fight continues in the center, with the Warhound having been eliminated (I think) by an arrow from Callie.  One of Tony's other minions, a Barbarian, advances to help his Templar.
Whew!  Stumpy casts Elemental Bolt and takes Freya out of the fight!

The opposing Apprentice gets confronted by a skeleton that appears from the near side of the Mausoleum...
...and gets knocked out!
The fight in the center broke my way!  The opposing Barbarian fled right, but Callie and Erik ran him down.
...and at top center, a skeleton is chasing down Tony's Templar.
...and takes him out of the fight.
And Stumpy and Dain move toward the table edge with a treasure chest.

At this point the game wrapped up.  Tony's Wizard left the field with some treasure, while his Wizard and henchmen all fell in combat.

Post-Game Report:
Both my Apprentice and Freya made full recoveries from their battlefield wounds, and I bagged 340 experience (good for three levels at 100 xp with 40 left over), picked up 240 gold and a dagger +1, as well as a grimoire containing the Bind Demon spell.  I raised my Elemental Bolt casting, Health, and learned the Bind Demon spell in anticipation of the next game, which may involve a Genie running amuck on the table.

Stay tuned for the next installment!